Are you a beginner craftsperson, or terrified of power tools? Don’t you try DIY project ideas because of noise or mess? No worries, I will show you how to use a miter box to cut wood without any power tools! This miter box will also help you get rid of noise or mess also.
What Is a Miter Box?
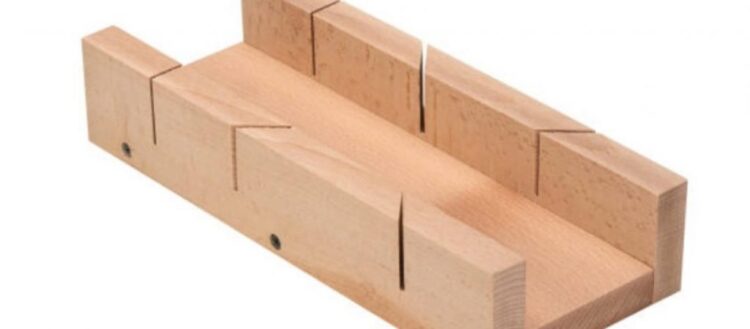
A miter box is a plastic, metal or wooden box that includes a hand saw to cut wood at certain angles. It is a wonderfully simple and affordable tool that helps any novice woodworker or DIYer to make accurate crosscuts in wood.
Being comprises of two components- a handsaw which has teeth for crosscutting and a box, that has slots on both sides to aid in accurate angled cuts, a miter box is a perfect solution for anyone less inclined with power tools.
Since these tools are hand-powered, they are noiseless and they are lightweight enough to be transported easily from one place to another.
Cutting woods using a miter box ensures the exact result than cutting wood freehand. Thanks to the slots of the tool that prevents moving sideways while working. So, even beginners can work confidently.
Also Read More About best miter boxes
Types Of Miter Boxes
There are various types of miter boxes available in the market among which some are designed for professional craftsmen while some others meet the need for a multipurpose tool for DIYers.
Mainly there are three different types of miter boxes available.
- Entry-level miter boxes come with molded plastic miter saws which you will find in a nearer brick-and-mortar hardware store. These types of miter boxes are available at a very affordable price and ideal for light-duty DIY projects.
- The next level miter boxes include a higher-quality saw for more precise cuts and hold-down clamps to keep the wood in place. These miter boxes ensure better strength and durability, hence ideal for trimming or molding.
- The superb quality miter boxes are specially designed for fine woodworking. This is the best option for a decorative piece that might get damaged by a power tool or any saw with harsh teeth.
Best way to use a miter box
You can’t just place the wood in the miter box and start cutting. There are a few simple steps you need to follow before you start cutting wood with a miter box to ensure the finest result.
Step 1: Clampdown the miter box
There is a huge risk of hurting yourself if you try to hold the miter box steady with one hand while sawing with the other. Therefore, using clamps to hold the miter box is the first step of your preparation. Lock your miter box to a stable surface using few quick-release clamps.
Step 2: Measure and mark the cut
Using a measurement tape, measure the length of the wood you want for your task and mark with a pencil. Then, use a carpenter’s square to confirm the line is exactly 90 degrees from the edge of the board.
Here, one side of the line is the ‘keep’ side and the other side is the ‘waste’ side. As the name asserts, you will be using the ‘keep’ side for your job. To avoid any kind of confusion, mark the keep side.
Step 3: Lay the wood in the miter box
Lay the wood inside the miter box, vertical or horizontal, depending on the cut you need for your project.
Mostly, miter boxes come with little peg clamps to hold the board against the back of the box. Line up the excess side of the cut line with the side of the slot.
However, if your miter box doesn’t include these clamps, there is nothing to worry about. Use your thumb to hold the wood in place while cutting. All you need to keep in mind is safety.
Step 4: Align the blade with your mark
Line up the piece of wood in such a way that the teeth will touch the line on the waste side.
Why cut on the waste side?
As the saw blade cuts the wood, it will remove some as well. Therefore, if you cut straight on the line, the board will come out shorter than you need for your job.
Step 5: Groove the cut line first
If you start cutting with full force, the blade will jump and you will end up getting a spikey edge. That’s why you should pass the blade lightly over the board and cut the edge of the board before proceeding towards the workpiece.
Step 6: Finish the cut
After grooving the edge, put a little more effort to finish cutting. But, never put too much pressure. Just let the teeth of the saw blade do the job.
Step 7: clean up
When you are done with sawing, make sure to vacuum the sawdust that has gathered in the box. Then, pack all the tools and materials up and store them in a safe place.
Final words
Now that you know all the peaks and perks about how to use a miter box, enjoy its blessings thoroughly.