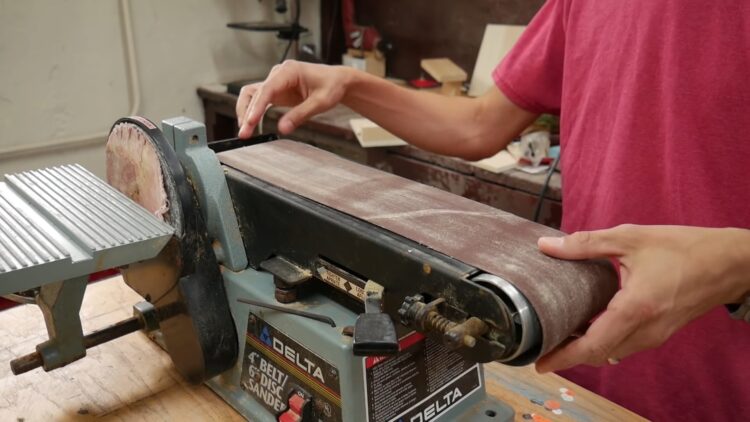
If you’re on a woodworking project that requires the leveling of a bigger surface area, then nothing beats the power and overall ability of a belt sander. These power tools are the definite go-to instruments if you’re looking to clear paint or varnish from old tables or other pieces of furniture in a hurry.
Choosing The Right Belt Sander
- While there is a long list of belt options which vary from grit to width, best sanders accommodate a sanding belt which is 3 or 4 inches wide on average. Wider belts take more experience and strength to control with a consistent motion, but you would obviously benefit by covering more surface area at a time. Other belt sanders have stronger motors, and though this could save you time if you’re looking to level some tougher material in a hurry, you have to take note that your grip and strength would be challenged as you handle all that power.
- Operators definitely factor belt width and motor power among other things when choosing the right belt sander, especially since it doesn’t take much for them to lose control and consequently ruin a finish. What you should be looking for is a belt sander which is bulky enough for you to handle, and not too weak for you to exert extra effort.
Belt Sander Maintenance
Sanding can be a notorious task for demanding patience, control and precision from any worker; manufacturers are quick to learn from this and intentionally design belt sanders to be tough and bulky in order for the job to be done as quickly as possible, regardless of the potential bumps and even drops that can happen.
As tough as belt sanders are, they are very simple to maintain. Every now and then, you would only need to make sure that the drums that do the spinning are aligned; consequently, you would need to do a quick check to see that the sanding belt is also aligned with the general position of the drums.
It gets worse: if it isn’t the belt that slips off, the rollers themselves could literally fly out, or uneven pressure could cause the sanding belt to do damage to the interior of the sander.
Now, this shouldn’t be too much of problems if you make it a habit of aligning the rollers every time to change the tool’s sanding belt. It isn’t too hard to do this extra step, especially if your belt sander features a tracking knob to make the job easier.
While checking the rollers is important, do not forget to check another important component: The platen. This seemingly simple piece of metal and cork is placed generally in between the belt and the sander’s shoe, and it provides the needed shock relief and absorption, resulting in a smoother sanding job.
The platen obviously gets worn over time and fails much like a brake pad would if it isn’t replaced regularly. If you observe that the metal on the plate is thinner, or if the cork is crumbly, replace it.
How To Change The Sanding Belt
Sanding belts lose their grit and tend to warp with continuous and intense usage. In order to change the belt, position the belt sander so that the open side would be revealed.
Depending on the manufacturer, use the mechanism (usually a simple handle) that releases the belt – the rollers would tilt or come closer together just enough to provide the necessary slack for you to remove the belt.
Check to see that the replacement belt is placed according to the direction indicated by arrows usually marked on the bottom, or your belt would not sand efficiently if it would even sand at all

Always prioritize safety – make sure the device is in a secure position, as most of the time you will need the belt sander to be on while you make the necessary adjustments. One thing that you should always prioritize is to make sure that the belt constantly runs and tracks in the center of the rollers, and in the plate if possible.
Other General Tips and Conclusion
- Sanding produces a lot of residues, and some of this could make way into your belt sander, or even into any tools nearby. Belt sanders usually come with dust bags, and they should always be secured unless you want all this sawdust blown all over your workplace. It is advisable to use some pressurized air to blast any dust and residue from in and around your belt sander, after every use if necessary.
- Even with all these fixtures and the maintenance involved, you must understand that the belt sander is no ordinary power tool – it is a rough and powerful machine, and you may need to practice in scrap material before using it on any significant surfaces. Work with the bulk of the belt sander, and you will soon find out that it is the ideal tool for quick leveling of any rough surface.

